
This tutorial was written in PSP 10 and for those with working knowledge in PSP
The tutorial is my design and any similarity to another tut is pure coincedence.
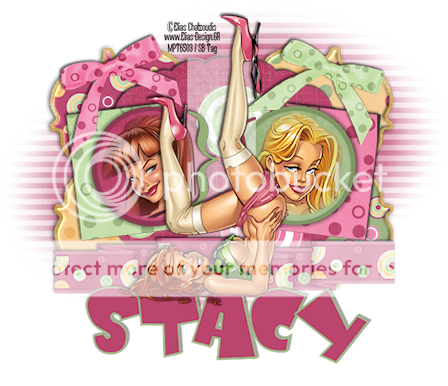
Art work is by Elias Chatzoudis www.elias-design.gr
You must have a license to use her work
Please visit My Psp Tubes to purchase one
The tutorial is meant as a guide only, your own creativity in a tutorial is the best part!
Supplies needed:
Gina's Template #27 Here remember to leave her some love. Thank you Gina for your talent!
Scrapkit by Bea Creations "Funky Dots" Here.
Thank you Bea for sharing your scrapkits with all of us!
WSL_Mask12 by Weescotslass
The tutorial is my design and any similarity to another tut is pure coincedence.
Art work is by Elias Chatzoudis www.elias-design.gr
You must have a license to use her work
Please visit My Psp Tubes to purchase one
The tutorial is meant as a guide only, your own creativity in a tutorial is the best part!
Supplies needed:
Gina's Template #27 Here remember to leave her some love. Thank you Gina for your talent!
Scrapkit by Bea Creations "Funky Dots" Here.
Thank you Bea for sharing your scrapkits with all of us!
WSL_Mask12 by Weescotslass
Font of choice, I used Baby Kruffy
Open Gina's Template duplicate and close original. We need to make the canvas larger so go to
go to Image > Canvas Size > and make it 800 by 800, we will crop later.
We are going to work each layer as we go so close ALL layers expect for the 4 Bracket Layer.
With the 4 Bracket Layer selected go to selections > select all > float > Modify > Contrast by:9
We need to make this a new layer so go to Selections > Promote Selection to Layer.
Go to your scrapkit backgrounds and find paper #3 and open it copy and then paste it as new layer on your template reduce the paper size by 60 pts and move it over to the top left bracket.
Now go to Selections Invert; select the paper layer again and hit delete, you will notice that some
of the paper is in the bottom bracket, it's okay for now we can erase it later if we need to. KEEP the template with the marching ants and Inverted so we can finish the rest of the brackets. You will do everything the same as above but with the following papers:
Paper #4 goes in the top right bracket
Paper #8 goes in the bottom left bracket
Paper #2 goes in the bottom right bracket
Once you have all the paper in your brackets Remember I said we would need to erase? Well here is where we need to erase any papers that have crossed eachother so deselect the layers and erase any parts that have crossed each other, once you have it cleaned up merge the paper layers.
Now to chipboard them:
Go to Effects > 3D effects> Inner Bevel and use these settings: Bevel #1 Width: 2 Smoothness: 20 Depth: 2 Ambience: 39 Shininess:0 Angle: 315 Intensity: 35 Elevation: 30 Color: white hit okay.
Open back up the bottom Bracket #4, we need to flood fill this layer with #cca353 (Selection > Select All > Float) chipboard this layer as well with the same settings as above.
Open next layer: Scalloped Oval/ selections > select all > float open Paper #12 copy and past into the scalloped layer (no need to resize unless you want to) Select > Invert make sure the paper layer is selected then hit delete.
Open next layer: Left Rectangle/ selections > select all > float Open payer #9 copy and past into left rectangle, resize by 60pts again make sure paper is completley over square / Select > Invert make sure the paper layer is selected then hit delete.
Open next layer: Right Rectangle/ selections > select all > float Open paper #7 copy and past into left rectangle, resize by 60pts again make sure paper is completley over square / Select > Invert make sure the paper layer is selected then hit delete.
Open next layer: Right Circle/ Selections > select all > float > modify > contrast 13 Selections > Promote Selection to layer Open Paper #15 copy and paste into Right Circle / select > Invert make sure the paper layer is selected then hit delete.
Select Right Circle bottom layer again, Selections > select all > float and flood fill with #98b17f
Open next layer: Left Circle/ Selections > select all > float > modify > contrast 13 Selections > Promote Selection to layer. Open Paper #14 copy and paste into Right Circle / select > Invert make sure the paper layer is selected then hit delete.
Select Left Circle bottom layer again, Selections > select all > float and flood fill with #8f3754
As in my tag you can put two character heads in the circle.. I will leave this up to you.
You will also need to select and flood fill the brackets in the middle of the template as I have done.
Open both bow #4 and #5 resize by 50 pts / rotate by 20 left and right .
You may need to sharpen a bit.
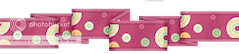
Open Ribbon #3 copy and past onto template and resize by 75pts and move to the bottom of the template.
Open up the tube of choice copy and paste and resize as needed.
I have put a drop shadow on ALL layers of (left side) -2, 3 , 40 , 2 (remember when you do the right side you want to flip the numbers)
MASK Background
Create a new Raster Layer and send to the bottom (remember to turn off the white layer) Flood Fill background with #bb446b. Open up and apply mask. You can resize and position where you would like.
You can resize now if you wish and crop down.
So I hope you enjoyed my first real tutorial. Let ,me know if anything was unclear and confusing lol
Huggers Stacy
No comments:
Post a Comment